Sam’s Final Review
I started at Boleh in November 2012, since I have been here I have learnt so much and gained my level 2 qualifications in both city and guilds and NVQ which completes my level 2 apprenticeship. To get this I have learnt about health and safety and the aspects of building and restoring different types of boats as well as learning the hands on skills needed to become a shipwright.
Also wile I have been here I have learnt about first aid and fire marshals and have gained a qualification in each, I have seen how much bigger company’s work compared to us by having a trip around BAE and I have seen how sails are made by spending a few days at a sail loft.
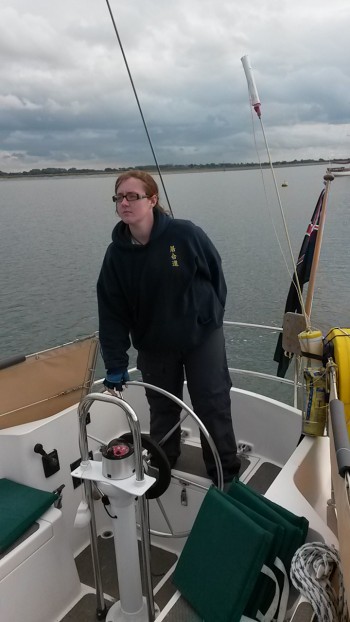
I got the opportunity to go sailing which I have never done before so I got to experience that as well. Also we have a private tour of HMS Warrior were I was able to see the extent of the work that goes into a historic vessel of that size.
Drawer and Hatches
Drawer and Hatches
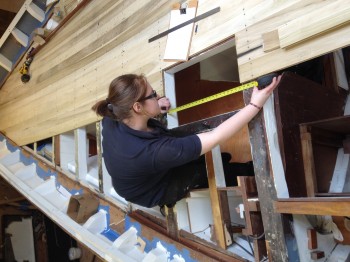
My next job at Boleh was to create the personal lockers and the cave lockers port and starboard sides of the V berth. To create these I measured the faces of the lockers and used the table saw to cut them out. Next I made a template for the sides of the personal lockers using 6 mm plywood hot glued together. I then used the template to mark out and cut out he sides of the lockers. I then looked at the boat drawing for the dimensions of the boxes to make the cave lockers, I noticed that if I made them to the dimensions of the drawing there would be unutilised space, so I amended the drawing and created new size cave lockers.
Next I marked out the cut outs for the openings of the lockers, I cut these out with a jigsaw and trimmed the edges with a router. These were then sealed with G4 and then painted and secured to the boat.
Visit to the Sailmakers
Visit to the Sailmakers
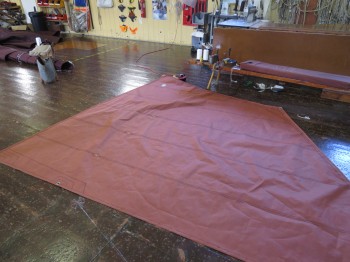
I spent three days at James Lawrence Sail makers, while I was there I learnt slot about marking sails. The sails I saw being made were made out of synthetic material that had been cut into strips of 18 inches then they were marked out to the right size and sewn together using the big sewing machines. They also had smaller sewing machines for doing repairs for sails and covers also for air con mesh. The thread and material comes in different weight and colours. I got taught how to whip and was asked to whip the rope for the reef points for a sail they were marking.
Bulwark Replacement
Bulwark Replacement
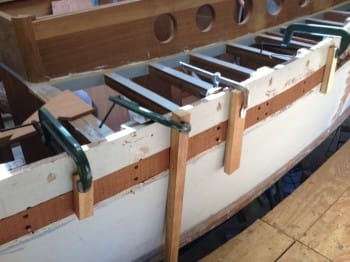
My Second Task at Project Boleh was to replace the bulwarks on the port side of Boleh I was asked to do this by Chris Cossor. The first thing I did was to make sure that the fire exits were clear and free from obstruction and that I know were the evacuation point were. I also checked who was reasonable for the first aid that month as we are all St John trained in First Aid at Work.
Then I obtain the correct PPE I would need for this task which was, steel toe capped boats and work clothing which I wore at all time. Also I had safety glasses, gloves, ear protectors and a dust mask to hand for when I needed them. Then I accessed the areas where I would be working, my bench, Boleh and the machine workshop, to make sure that they are risk free and safe for me to work in also I checked warning signs around the workshop making sure I would appalling with them while carrying out my task.
I then checked the portable power tools that I would need. The jigsaw I made sure that it had the right size blade for the wood I would be cutting with it, that the cable was free of any cuts or splits, that all the buttons and switches worked and when it was turned on that it worked. The drill I made sure that the chuck worked, the buttons and switches worked and that the battery was charged so it was ready for when I needed it. The orbital random sander and belt sander I checked that the bed was in a suitable condition, the switch worked, the cable was free from cuts and splits and when it was turned on it worked. I also got the sanding disks and belts I would need so they were ready for when I needed them. The electric planer I checked the blades were sharp, the bed was flat, the switch worked and that the cable and plug were undamaged and in a safe condition.
I then checked the hand tools I would need. Chisels I made sure they were sharp and if not I sharpened them using my diamond stone. My planes I made sure that they were sharp again if not I sharpened that also that the foot was square and that they were adjusted right. My saw were sharp and that my hammer and mallet was in a suitable condition to be used safely.
After that I checked the substances that I would be using and made sure that I complied with the COSHH regulations by using it correctly and safely and wearing the right PPE.
When I had made all my safety checks I was ready to start the job. The first thing I needed to do was to take the rub rails off while making sure that I did not damage them as they would be going back on the boat to do this I used my chisel and mallet to dig the wooden plugs out to expose he screw head so I could unscrew the rub rails from the boat then I had to gently prise it off because it was stuck on with Arbomast BR. After I got the rub rail off I could then access the bulwarks. I had to remove most of the bulwarks that needed replacing I did this by using my chisels and mallets while I was removing the old bulwarks I made sure that the top and bottom had a slight angle on them as this would help me fitting the new one.. After this was done I had to make templates to do this I got a sheet of 6mm plywood and cut it into 100mm strips to cut the ply I used the table saw so I set the fence to 100mm turned the extraction on and started putting the wood through making sure that when my hands touch the bed I used the push stick when I had enough for the templates I then had to shape the templates. So I took the strips up to the boat and one at a time tacked them to the boat and spilled them in to get the shape I needed when I had my spilling line I the cut it out using that band saw and block plane. When all the strips were shaped I was ready to glue them together to do this I tacked the strips back on to the boat and then got so short bits of plywood and glued to top strip to the bottom using the hot glue gun. The bit I was replacing was long so it easier to do it in two parts. So when I had my two templates I was ready to transfer it onto the Iroko so I clamped the template to the Iroko plank and spilled the shape on to the Iroko. When I done this I was ready to cut the shape out to do this I used the jigsaw. So I put the wood in a suitable place to be able to work safely and I cut the shape out making sure that I was sticking to the lines that I had drawn because I was doing it in two parts I fitted one at a time.
When I had my cut out I put it against the boat to see how close I was as it was nearly there I then angles the top and bottom so that it would slid in better and the front would be a tight fit to do this I used my smoothing plane. When the first part was done I then had to clamp it to the boat to help me screw it and also help get the shape of the boat.
When the first on was screwed and clamped I was ready to start the second one. In which I did the same thing to get it to fit in. When they were both screwed in I then released the clamps and I was able so plane and sand the outside down so it was flush with the outside of the boat. To do this I used an electric planer to get rid of the majority of the excess wood and then I used the belt sander to get it right.
When I had finish the main part of the bulwark I then had to do a small section up at the bow of the boat to do this id did the same as before. I used my mallet and chisel to remove that part that needed replacing then I make a template for it I then put then template onto the new wood I would be using.
When I had the outline of my template I was able to shape the wood to fit because I didn’t have a lot of wood to take off I used my smoothing plane to get the wood to size. As I was planning I keep checking the wood against the boat to see how much more I needed to take off.
When the wood fitted I then had to fix it in place but I found that because the wood was a short piece I had trouble bending it into place so I cut 10 mm groves into the back so the wood could bend easier when it was bent into place I also clamped it so I could put the screws in. When it was screwed in I then used the electric planer to plane down the outside then used the belt sander to get it flush with the boat. When it was all done I put all my tools away and cleaned up the mess I had made by planning reinstating my work area.
Want to get involved and Volunteer?
From Skippers to Open Day Stewards, there are lots of ways to get involved – we would love to hear from you!
Task One
Task One
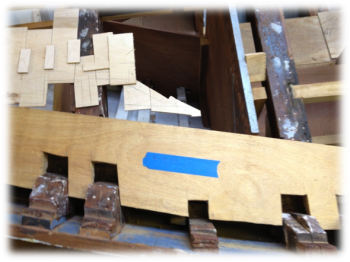
My first task at Project Boleh was to replace the capping board on Boleh I was asked to do this by Chris. The first thing I did was to make sure that the fire exits were clear and free from obstruction and that I know were the evacuation point were. I also checked who was reasonable for the first aid that month as we are all St John trained in First Aid at Work.
Then I obtain the correct PPE I would need for this task which was, steel toe capped boats and work clothing which I wore at all time. Also I had safety glasses, gloves, ear protectors and a dust mask to hand for when I needed them. Then I accessed the areas where I would be working, my bench, Boleh and the machine workshop, to make sure that they are risk free and safe for me to work in also I checked warning signs around the workshop making sure I would appalling with them while caring out my task.
I then checked the machines that I would be using on the table saw I checked that the blade was sharp, the extraction was connected properly and it worked, the fence was square and that when it was turned on that it worked, that it sounded right and that the emergency stop button worked. On the band saw I checked that it was sharp and the right size belt for the wood I would be cutting, the fence was square, the extraction was connected properly and that it worked, and when the band saw was turned on that it worked and sounded as it should and that the emergency stop button worked. Then I checked the planner thicknesser I did this by making sure the blades were sharp, the extraction bucket fitted and worked, the fence was square, the bed of the thicknesser was able to be adjusted and that when it was turned on it worked and sounded as it should. Then I checked the pillar drill by making sure that the chuck worked, the arm leaver worked, the bed could be adjusted and that when it was turned on it worked and that it sounded right.
After I had checked the machines I then checked the portable power tools that I would need. The jigsaw I made sure that it had the right size blade for the wood I would be cutting with it, that the cable was free of any cuts or splits, that all the buttons and switches worked and when it was turned on that it worked. The drill I made sure that the chuck worked, the buttons and switches worked and that the battery was charged so it was ready for when I needed it. The sander I checked that the bed was in a suitable condition, the switch worked, the cable was free from cuts and splits and when it was turned on it worked. I also got the sanding disks I would need so they were ready for when I needed them.
I then checked the hand tools I would need. Chisels I made sure they were sharp and if not I sharpened them using my diamond stone. My planes I made sure that they were sharp again if not I sharpened that also that the foot was square and that they were adjusted right. My saw were sharp and that my hammer and mallet was in a suitable condition to be used safely.
After that I checked the substances that I would be using and made sure that I complied with the COSHH regulations by using it correctly and safely and wearing the right PPE.
When that was all done I could then start my task the first thing I had to do was make the scarf joint on the boat so the capping board could be fitted properly. So I make a template of the scarf from the scarf along the capping board that did not need replacing. I did this by using MDF blocks to make a template so I could spill it on to some off cut wood to make a template the I could use on all four scarf joints when I have made the template I hot glued it to the boat where the scarf needed to be then I cut it out using my saw, chisels and mallet. I left the template in place instead of just drawing around it so I had a flat face to run my saw along this helped keep my scarf joint square. As I was cutting out the scarf joint I was coming across broken off screws in to wood so I chiselled of layers of the wood to see if I could find them so my saw did not hit them.
When all four off the scarfs where done I was ready to start making the template to get the shape of the capping boards I did this by using the table saw to cut 60mm strips of six mm plywood. I started cutting the wood by gently pushing the sheet of ply through the machine while making sure that the extraction was sucking up the dust. When my hands were touching the saw table I got the push stick to push the wood past the saw blade I did this for the sheet of ply. When all the wood was cut I then turned the saw and the extraction off. Then I needed to cut the strips down to 30 mm lengths I cut them at 30 mm to make sure that they were wide enough for the capping boards, to do this I marked 30 mm along the strips. then I used the band saw to cut them I set fence to 30 mm and only had 10 mm of the blade showing as I was cutting 6 mm ply then I opened the right flap on the extraction system after I had shut the flap for the table saw then I turned the extraction on. Then I started cutting the wood making sure that my fingers were not near the blade by using the push stick. When they were all cut I turned the machines off and took all the strips up to the boat and started making the template by putting the strips up against the boat where the capping board needs to be replaced some of the strips were still too wide to go I between the ribs so I used my smoothing plane to plane them down to fit. When the strips were in place as close to the shape of the boat as I could get them I used hot gun to stick the strips together to make it strong and also so I could move it later to put on the new wood. When both the port and starboard templates where done then I used my spilling block and ran it around the shape of the boat marking a parallel line on to the template. When I did this for both sides of the boat I then had the shape I needed.
As the templates were done I started preparing the wood. The wood I was using was Iroko so first I used my tape measure half way along the plank as both capping boarded could be make out of one plank then used my square to mark it the full width of the wood then I made sure the wood was in a suitable place for me to use the jigsaw to cut it in half by keeping to the line I had just drawn doing this it made wood a more manageable size.
When the wood was at a more manageable size I had to use the planer thicknesser to get the wood at the right thickness so it would fit and also so I could glue ply to the underside to make it stronger. As the wood was still heavy I asked Chris to help me run it though the thicknesser. I first set the bed to the right height to only take one mm of at a time. Then I opened the excitation flap, turned the extraction system on, obtained some ear plugs to protect me ear from the noise of the machine and turned the machine on. Then we started feeding the wood through checking it as it came out the other end then I move the bed up another mm then we turned the wood over so that both sides got planed. We kept doing this till both bits of wood were at the right thickness. When they were done I turned the machine off and removed my ear plugs.
Then I had to cut the ply, for the back, to the right size to do this I used the table saw I set the fence to the right width for the wood that I needed. Then I shut the planer extraction flap and opened the one for the table saw, turned it on and started feeding the wood through using the push stick to keep my hands safe. When the wood was cut I then had to prepare the wood to be glued together. To do this is had to score both bits of wood because the wood had just been planed the faces were smooth and the glue would not stick well. Then I used acetone to wipe down the surfaces I did this because we use machine glide on our machine so the acetone would remove it if any was left on the wood. Before using the acetone I put on some gloves to protect me skin. When the acetone had dried I was ready to glue the wood together. To do this I needed Chris’s help again so we got the all the G clamps that we would need, put on glove as stated by the bottle of glue. We glued both the ply and the Iroko then laid them on top of each other and clamped them together. We did this to both bits of wood but at different time because we did not have enough G clamps to do both at the same time when the glue had nearly gone off I used my chisel to get the excess glue off. When both bits were glued I was ready to put my template on and spill it on to the Iroko to get the shape of the capping board to hold the template in place I used tacks then I ran my spilling block around on the line I had marked early and marked a parallel line onto the Iroko. When this was done I was ready to cut it out using the jigsaw.
Where I had glued the wood together was also a suitable place to use the jigsaw as I had room to work without being in anyone way and also it was free from hazards. Before I started using the jigsaw I clamped the wood to the saw horses to stop the wood moving. Then I started cutting making sure that I was on the outside of the line so I know it would be slightly too big. When both bits were cut out I took them to the boat to see how they fitted.
As it was still too big I had cut some more wood off so I didn’t take too much off I marked 2mm around the inlets for the ribs and used the jigsaw to take it down to the new line. I kept doing this till it fitted after that I then had to angle the outside of the wood as the boat curves this would give me a tight fit against the side of the boat and the ribs. To do this I used my bevel to get the angle I need then set it up on the jigsaw then cut the relevant bit as there were several different angles along the boat so I had to set the jigsaw up at different angles to make it a tight fit against the boat. When I had got a tight fit on both the port and starboard side I was ready to fix it to the boat.
Toolbox
Toolbox
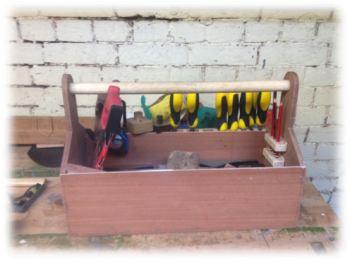
The first task at Project Boleh was to make our own toolbox. The first thing I did was draw out how I wanted the toolbox to look and workout the measurement I would need. The next this I did was to draw out the sides and end on to the plywood and cut them out using the jigsaw then I planned down the edges to get them flat and square. After that I got some thinner plywood and draw out the bottom and cut it out and planned it square and flat again. I then got an old broom handle for handle for my toolbox. I cut it to size and sanded it down.
After I had all the bits ready put it together using glue and tacks.
After the glue had set I then chiselled it excess glue off and planned and sanded it to make it look nice.
When I was all cleaned up I then put in the slots and pockets for tools like my chisels. Also I put a pencil holder on the side. To do this I used pine which I chamfered the edges to make it look nice. When I put the slots in I then put some thin plywood on the side. I then put two rails down the other side to hold my saw.
Dimension Frame
Dimension Frame
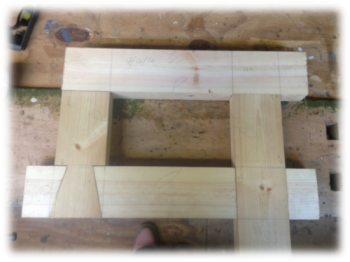
Our second task at Project Boleh was to make a dimension frame with a different joint in each corner a Haunched Mortise and Tenon, a through Mortise and Tenon, a Halving joint and a Dovetail. First I practiced the joints so I could understand how to make them and how they go together. I did this by making sure the wood I had was suitable and square, then I marked out the joint I was doing then cut it out and fitted it.
After I had practiced all the joints I then started on the frame. The first thing I did was to check the wood was square then I face and face edged the wood so I had a datum to work to then I started on the joints. I first did the dovetail I did this by using the 1:6 ratios for the angle of the dovetail as I was using softwood I marked out the angle and also used a marking gauge to mark halfway down the thickness of the wood. I then cut the shoulders out using a tenon saw, and then I chiselled the excess wood of the back making sure it was flat then I chiselled down the angles again making sure it was flat. That I drew around the pin on to the next bit of wood again marking half the thickness. I then cut down the lines to the halfway line and chiselled out the excess wood making it flat. I then made sure it fitted.
The second joint I did was the halving joint I did this by again marking the halfway line onto both bits of wood I the marked the width of the wood on to both bits. I then cut down to the halfway make at each width make and chiselled out the excess was making it flat and square I then did the same on the other bit of wood but working from the underside. I then made sure it fitted correctly.
The third joint I did was the through Mortise and Tenon. I started this by marking one bit of wood the thickness of the wood in to thirds down to the width of the wood so I had the marking out for the tenon I then marked a third on the top of the other bit of wood for the Mortise I then chiselled out the Mortise all the way through making sure the I was square and upright. Then I cut out the tenon I did this by cutting the shoulders the chiselling both sides until there was just a third left in the middle. I then checked the fit.
The last joint I made was the Haunched Mortise and Tenon. I did this by making the width onto the end of one bit of wood and marking thirds again then making thirds on the top of the other bit of wood. I then marked the haunch on by going ten mm in from the end then I chiselled the mortise out down two thirds of the height of the wood but on the haunch only going down ten mm. I then cut the tenon out again but cutting down the shoulders and chiselling both sides leaving a third in the middle. I then marked the haunch on to the tenon and cut it out. Then I made sure it fitted.
When all the joints were done I fitted the frame together.


