Reuben’s Final Review
My name is Reuben and I started here as an apprentice in November 2012 with minimal hand skills, now almost 2 years down the line I feel a much stronger version of myself with even greater confidence to where I am going to progress my life after leaving. My next current step is to complete the RYA Yachtmaster course and purchase my own vessel.
Boleh on the whole has set me onto the right path in life through superb mentoring to myself as an individual. I have been given tremendous opportunities and learning experiences of various tasks and experiences days, such as Sailing, a visit to the Blacksmiths, other boat yards, sail makers and many more.
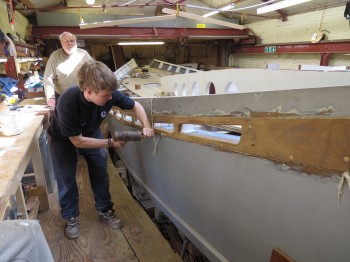
Boleh has given me the first step to starting my career, providing me great hand skills which have been able to assist in the property development and restoration service me and my Father provide.
Replacing Bunks in Main Saloon
Replacing Bunks in Main Saloon
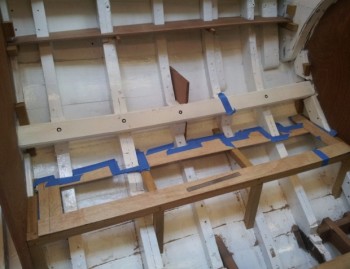
I was allocated to build two of the bunks in the saloon area, one was fixed and the other of which is folding, I firstly machined the timber to create the battens for the frame work, once the framework was built it was time to make the template, this was the first template I had ever made so it was a fast learning curve and had to be done right. Once the template was made I transferred it onto a sheet of ply, then cut and fitted it to the base of the bunk. I continued on piece by piece until the hinges arrived, once the hinges had arrived I fixed them to the two pieces of ply to create the fold down. After this stage was complete I created the storage compartments and lined them out underneath with ply. Varnished and the bunk was complete, this is just a short summary of the events that had taken place, if you would like to read the whole step by step process I went through and the methods I used to create these bunks, please get in touch.
Transom Levelling and Fitting
Transom Levelling and Fitting
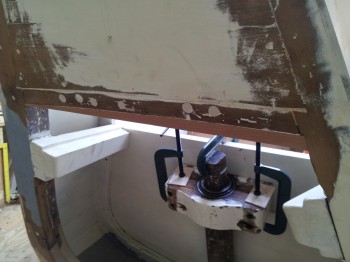
The task I was issued was to level the back of the transom as the original piece was out of level, firstly I had to mark the true level below the original piece and cut a piece of wood to sit flush with the mark I had created.
Once I had screwed this into the original piece of wood I had to make sure it sat flush with the original piece of wood, to do this I used the disc sander and sanded the wood until all the edges came in at consistent angle and there were no high spots.
The next stage of this repair was to add a piece of wood on the other side of this to sit flush with the wood I had just fitted, to do this I had to use a bevel to mark the angle I needed on each end of the piece of wood.
Once I had created these angles I attached the piece of wood using an epoxy resin and copper pins. Once the glue had set I sanded the two pieces of wood to achieve a small radius of where the two pieces of wood met.
Hull Repairs
Hull Repairs
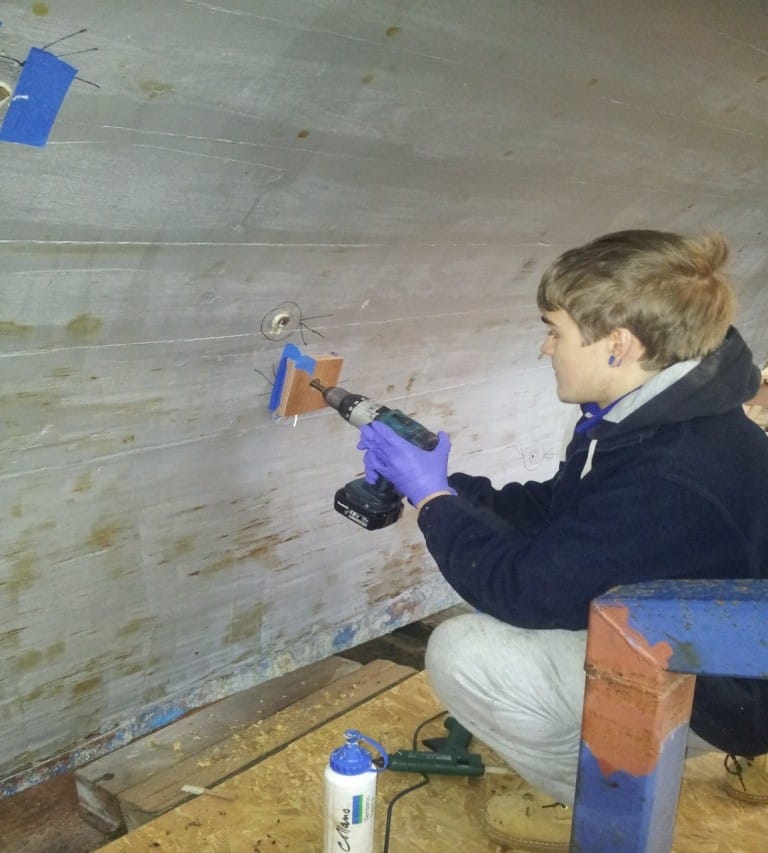
The hull of the boat has many screws and holes in which needed removing / filling.
My first role was to make up some 1 inch plugs, I located an old but intact piece of chengal ( the original wood the boat was built out of) and cut some plugs out on the pillar drill using a plug cutter.
The next stage was to make up a template so that when I was drilling into the hull it wouldn’t wonder and wreck the hull even more. I did this by using the plug cutter and drilling all the way through a piece of 1 inch ply. I applied tape to the ply and to the boat, I then attached the two pieces of tape too each other by using a hot glue gun, the reason the tape is on there is so it doesn’t rip the paint off of the hull or damage it even more.
I then drilled into the hull with the template fixed to it as a guide, I had to drill in about ¾ of an inch, although on some of them I had to drill the whole way through the boat until it came out inside the boat due to the hole going all the way through originally. Once I had drilled into the hull, I then coated a Chengal plug in epoxy resin and fitted it into the hole I had made and was left to dry. Once the plug was dry and secure I cleaned the glue off and sanded down using a disc sander with a p80 pad, it then sat flush with the original hull.
Want to get involved and Volunteer?
From Skippers to Open Day Stewards, there are lots of ways to get involved – we would love to hear from you!
Deck Beam Routing
Deck Beam Routing
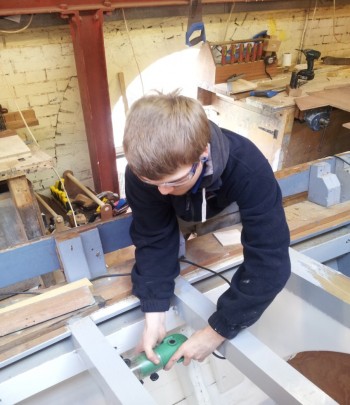
On the forward cabin of the boat all of the deck beams have a radius 100mm from the fixing each side, all the other beams back from the forward cabin do not have this, so I was asked to continue this onto every beam.
Firstly I made up a template 100mm long of 6mm plywood so I could mark out easily, I then continued to mark in 100mm from the beam fitting, I squared this line round all over so I could easily see where my stop and start point was.
The next stage was to create a radius I did this using a small hand router, whilst wearing safety glasses in case of any dust or small piece of wood flying up. Once this was finished I then ran a piece of p 120 then p240 sand paper over the beams to create a nice smooth finish.
Transom Rebuild and Repair
Transom Rebuild and Repair
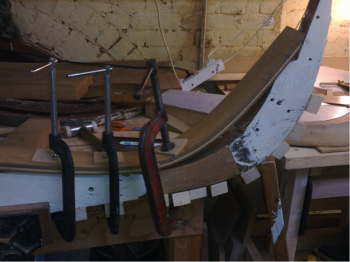
Boleh needed a new transom built and rudder fairing. My first role was to repair the original would if it was saveable.
Firstly I cut down into the damaged wood using a tenon saw, until none was left and removed the whole section using a chisel to create a smooth and outcrop so the replacement piece of wood would sit flush touching the surface area all over with no gaps.
I then replaced the damaged wood with a piece of Iroco which I glued into the original piece of transom, this was then clamped down using clamp pads and G clamps and left over night for maximum strength.
Once I had done this I shaved and then sanded down until flush and smooth with the original wood.
Door Frame with Moulding Rebate
Door Frame with Moulding Rebate
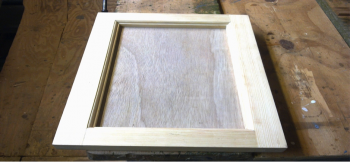
Firstly I machined 4 lengths of timber square and parallel with each other.
Then on the router table I created a rebate and a moulding using two different cutters.
Once I had done this I marked out where the mortice would be and drilled down with mortice machine also creating my haunch at a different depth to the mortice.
Once this step was completed I had to create a mitre using a mitre block, this helped me create the perfect angle so that the tennon fitted flush the moulding had to be mitred on all 4 pieces.
To do this I used a mitre block and a chisel to create the perfect angle for all the joints to sit flush.
Once I had done this I fitted it together and cut off the ends flush so you could see the haunch.
Designed and Built Trestles
Designed and Built Trestles
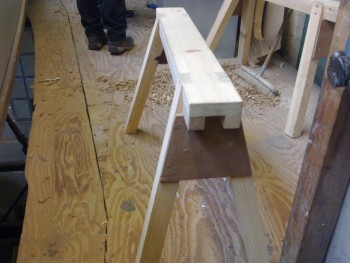
First of all I were shown a drawing of how the legs would be attached by drawing it out on a piece of plywood, this also gave myself the angle which the legs would be fitted at. This also gave myself a mental picture.
Then I glued 3 pieces of pine together to give us our top.
I then machined 4 legs parallel and square on the planer.
Then I cut out the 4 joints of the piece of pine using a tenon saw, these pieces of pine would be used for the legs of the trestle’s
I then cut out the faces of the 4 legs and fitted them to the piece of pine using glue and screws, I drilled a pilot hole for the screw to go into easy.
Once the legs were attached I created a piece of ply wood to go over the end of the legs to provide strength and support.


